
You do not have a storage problem. You have a decision problem. A kitchen without a pantry has a fixed amount of cabinet space, which means something you currently own has to lose its spot. Most organizing articles skip that uncomfortable part and jump straight to buying bins. Do it in the wrong order and you end up with a drawer full of empty bins and the same cluttered kitchen. Organize a small kitchen without a pantry.
So: decide first, buy second. Here is the order that works.
Step 1: One cabinet becomes the pantry
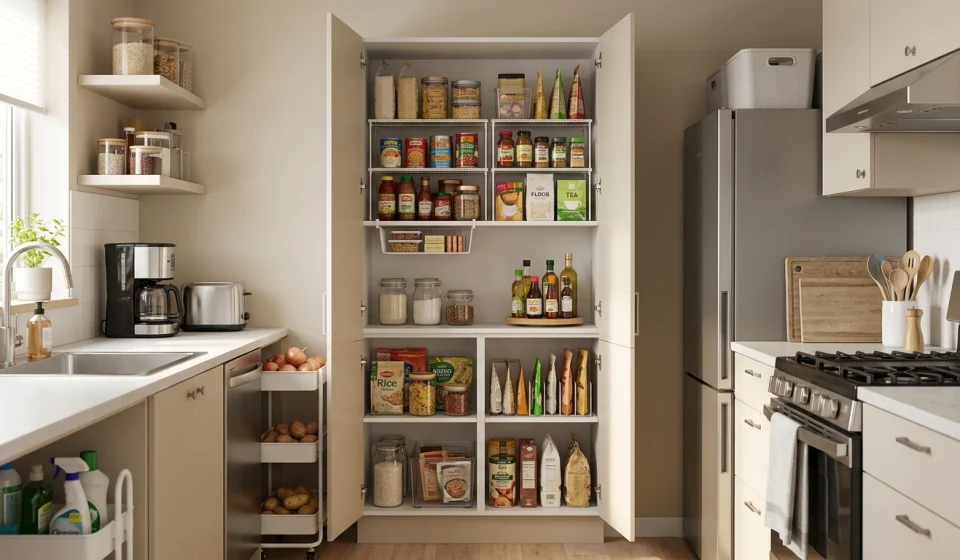
Pick the cabinet closest to your main prep counter and empty it completely. From today, every shelf-stable food item in the house lives there. Rice, pasta, oil, snacks, tins, the chaat masala, all of it, in one place.
The reason is simple. When food lives in four different cabinets, you cannot see what you own, so you buy a third bottle of soy sauce while two hide behind the mugs. One food zone ends that.
Yes, this means the mugs, the extra water bottles, or the vase get evicted to a less convenient cabinet. That is the trade. A pantry cabinet you open ten times a day deserves the prime spot more than a vase does.
Step 2: Double the shelf, not the cabinet
Cabinet shelves waste vertical space. There is usually 25 to 30 cm of dead air above every row of tins. Three cheap fixes recover it:
- A shelf riser turns one shelf into two. This is the highest value ten dollars in kitchen organizing.
- An under-shelf basket clips onto the shelf above and catches flat things: wraps, napkins, seasoning packets.
- A two-tier turntable in the corner for oils and sauces, so nothing gets stranded behind the vinegar.
If your cabinet doors have clearance, a slim door-mounted rack holds spice jars or the foil and cling film boxes. Measure the gap between the closed door and the shelf edge first. Most shelves leave about 7 cm, and most slim racks need exactly that, so check before ordering.
Step 3: Decant less than Instagram tells you
Matching glass jars photograph beautifully and mostly waste your time. Every decanted item is a container to wash, a label to make, and a refill chore.
Decant two categories only: staples you scoop several times a week (flour, rice, sugar, tea) and anything insects love. Everything else stays in its original packet, stored upright in an open bin like files in a folder, so you can flip through packets instead of excavating a pile.
Step 4: The counter rule
Only appliances you use daily earn counter space. The kettle stays. The toaster, maybe. The stand mixer you use monthly goes up top, and the air fryer earns its spot only if it actually runs most days.
A cleared counter is not just tidier. It is functionally extra storage, because prep space you no longer fight for means the cutting board and tonight’s ingredients have somewhere to land.
Step 5: Use the awkward zones
Small kitchens hide storage in strange places:
- Above the fridge: the once-a-month stuff, in a labeled bin with handles, because you will be reaching on tiptoe. Party platters, the extra oil, the giant thermos.
- Under the sink: cleaning supplies only, never food. It is warm and occasionally damp down there. A cheap tension rod across the cabinet lets spray bottles hang by their triggers, which frees the entire floor of the cabinet.
- A rolling cart: the classic three-tier cart fits a 35 cm gap and works as a false pantry. Snacks on top, onions and potatoes on separate tiers, because stored together they make each other sprout faster.
- One wall rail with S-hooks near the stove for the five tools you actually cook with. Five. Not the whole utensil crock.
Step 6: The eat-me-first bin
Put one small open bin at eye level in your pantry cabinet. Open packets, near-expiry items, and half-used ingredients go in it, and dinner planning starts there before anything else gets opened. This one bin reduces food waste more than any app I have tried, because the problem was never knowledge. The problem was that the open packet was invisible behind the new one.
Renter-friendly notes
Everything above except the wall rail works without a single drill hole. Tension rods, door racks that hook over, adhesive hooks rated for the weight, and the freestanding cart all leave no trace. Skip the rail if your deposit matters, or use a heavy-duty adhesive version and accept that it holds spatulas, not cast iron.
The 45-minute version
- Minutes 0 to 10: empty and wipe the chosen pantry cabinet.
- Minutes 10 to 25: collect every food item from everywhere in the kitchen into that one cabinet. Toss anything expired. Do not organize yet, just consolidate.
- Minutes 25 to 35: clear the counter down to daily-use appliances.
- Minutes 35 to 45: set up the eat-me-first bin, then write a shopping list of the organizers you now know you need.
Then stop. Live with the rough version for one week before buying anything. You will end up buying about half of what you thought you needed, and the kitchen will have told you exactly which half.
Conclusion
Organizing a small kitchen without a pantry is less about finding more space and more about making better decisions with the space you already have. Give shelf-stable food one clear home, use vertical space before adding more furniture, keep the counter for things you genuinely use, and stop buying organizers until you know what problem they need to solve.
You do not need a Pinterest-perfect kitchen. You need a kitchen where you can see what you own, reach what you use, and put everything back without rearranging half the room.
Start with one cabinet. The rest gets easier from there.
Frequently Asked Questions
How do you store food in a small kitchen without a pantry?
Choose one cabinet as your main food zone and keep as many shelf-stable items there as possible. Use shelf risers, turntables, open bins, and upright packet storage to make the cabinet easier to see and access. Bulk items or rarely used extras can go in secondary storage, such as a bin above the fridge.
Where should pantry items go if you do not have a pantry?
Keep everyday pantry items as close as possible to your main food-prep area. Rice, pasta, oils, spices, tins, snacks, and other frequently used ingredients should get the easiest-to-reach shelves. Less frequently used food can go higher up or in a rolling cart if cabinet space is limited.
How can I add storage to a small kitchen without remodeling?
Start by using space that already exists. Shelf risers can double usable cabinet height, under-shelf baskets use otherwise empty space, and a slim rolling cart can turn a narrow gap into extra storage. Over-door racks, tension rods, and removable adhesive hooks are also useful renter-friendly options.
What should stay on the counter in a small kitchen?
Keep only the appliances and tools you use most days. Everything else should have a cabinet, shelf, or higher-storage spot. The goal is not an empty counter for appearance’s sake; it is enough clear workspace to prep food comfortably without moving appliances first.
Should I decant pantry food into matching containers?
Only when it makes daily life easier. Frequently used staples such as rice, flour, sugar, or tea can be worth decanting, especially if sealed containers help protect them from pests or moisture. Most other foods are easier to keep in their original packaging and store upright in open bins.
What is the cheapest way to organize a small kitchen without a pantry?
Start by buying nothing. Consolidate your food, remove expired items, clear the counters, and live with the new layout for several days. Once you can see where the actual bottlenecks are, buy only the organizers that solve those specific problems. In many kitchens, one shelf riser, one open bin, or one small turntable is enough to make a noticeable difference.